Whonix-Host Operating System (OS) ISO

Right.

minor: [Help Welcome] KVM Development - staying the course - #282 by Patrick

--redistribute if you like to enable Whonix repository by default. Perhaps --redistribute was not a great name for the parameter?

(background: I plan on making Whonix easier to fork. Ideally Whonix would be come $project_name which can be configured by build parameter so anyone can easily create a ForkNix-Workstation (some new name chosen by forker) rather than Whonix-Workstation with most name strings generic/switched in the Whonix source code. This this is a major refactoring I’ll wait until the dust for Whonix host has settled, there is no rush.)

I did not test hardened-debian-xfce for some time. Build might even still be functional. hardened-debian-xfce still is underdeveloped with some “minor small edgy things” (lacks package usability-misc by default) but should be good enough for development.

OK, maybe not that important at this stage.
Build breaks, can I safely ignore it (seems to be related to virsh xml settings, don’t need it as I am building a host VM)?
http://forums.dds6qkxpwdeubwucdiaord2xgbbeyds25rbsgr73tbfpqpt4a6vjwsyd.onion/t/error-while-building-hardened-debian-xfce-15-0-0-1-0-2-no-hardened-debian-xml/7252

EDIT: ignored it, building continues… :slight_smile:

1 Like

Update Report: building host with hardened-debian-xfce

Building with

sudo ./whonix_build --flavor hardened-debian-xfce --target qcow2 --build

went successful. On first boot, I realized there was not /etc/apt/sources.list file, so I created one with debian buster repos myself. Probably caused by not adding the --redistribute flag during build?

Anyway, after successful build, I did a quick and dirty bash script which mounts the hardened-debian raw and installs the following packages:

qemu-kvm libvirt-daemon-system libvirt-clients virt-manager

Then, and while still in chroot and a (dirty) scripted way, I configured the Whonix network and VM following official documentation

chroot $HARDENED_CHROOT/chroot addgroup user libvirt
chroot $HARDENED_CHROOT/chroot addgroup user kvm
cp *.xml $HARDENED_CHROOT/chroot/tmp/
chroot $HARDENED_CHROOT/chroot service libvirtd restart
chroot $HARDENED_CHROOT/chroot virsh -c qemu:///system net-autostart default
chroot $HARDENED_CHROOT/chroot virsh -c qemu:///system net-start default
chroot $HARDENED_CHROOT/chroot virsh -c qemu:///system net-define tmp/Whonix_external_network-15.0.0.0.9.xml
chroot $HARDENED_CHROOT/chroot virsh -c qemu:///system net-define tmp/Whonix_internal_network-15.0.0.0.9.xml
chroot $HARDENED_CHROOT/chroot virsh -c qemu:///system net-autostart external
chroot $HARDENED_CHROOT/chroot virsh -c qemu:///system net-start external
chroot $HARDENED_CHROOT/chroot virsh -c qemu:///system net-autostart internal
chroot $HARDENED_CHROOT/chroot virsh -c qemu:///system net-start internal
chroot $HARDENED_CHROOT/chroot virsh -c qemu:///system define tmp/Whonix-Gateway-XFCE-15.0.0.0.9.xml
chroot $HARDENED_CHROOT/chroot virsh -c qemu:///system define tmp/Whonix-Workstation-XFCE-15.0.0.0.9.xml

You were right, I was able to configure the network using the .xml files after running service libvirtd restart in chroot (see above).

However, configuration of VM does not work:

error: Failed to define domain from tmp/Whonix-Workstation-XFCE-15.0.0.0.9.xml
error: invalid argument: could not find capabilities for domaintype=kvm 

The thing is, that I am running all the build and above commands inside a debian buster VM. Maybe this causes the could not find capabilities for domaintype=kvm error? Is there any known workaround to force the domain definition?

EDIT: I mounted the .raw VM file directly on my host and it did not work either. Somehow the chroot environment does not “believe” that it has kvm capabilities, although the host pseudo-filesystems are binded to it:

mount --bind /dev chroot/dev
mount --bind /proc chroot/proc
mount --bind /dev/pts chroot/dev/pts

Currently looking online for a solution, nothing found yet.
1 Like

Most likely.

OK, I have searched and searched and I have found no solution to the error: invalid argument: could not find capabilities for domaintype=kvm error.

So I have resorted to a dirty trick: I changed the ‘kvm’ flag to ‘qemu’ in the Whonix-Gateway.xml file (so the domain can be defined in chroot), and then I just replace ‘qemu’ by ‘kvm’ back directly in the /etc/libvirt/qemu/Whonix-Gateway file of the host vm:

chroot $HARDENED_CHROOT/chroot virsh -c qemu:///system define tmp/Whonix-Gateway-XFCE-14.0.1.4.4.xml

sed -i "8 s/^.*$/<domain type='kvm'>/" $HARDENED_CHROOT/chroot/etc/libvirt/qemu/Whonix-VMs .xml

Seems to work: on first boot, the host is able to boot the Whonix-Gateway with KVM hypervisor.

Would such a dirty workaround be acceptable? I see no other solution at the moment.

1 Like

+1 keep whisker on Host.

My good guess is that KVM needs a little work to mount stuff in chroot because kernel modules are involved.

See if this post on building KVM VMs outside a virtual environment helps. They use debootstrap:

1 Like

Well, you are probably right, but at this stage the VM is already built (hardened debian build) but just refuses to define a kvm domain, even after binding the pseudo-filesystems.

Anyway, as my workaround did the trick, I built a new ISO, after adding some non-free firmware packages and network-manager-gnome (necessary to have the network applet in the panel that allows user to connect to a wifi graphically).

ISO size is around 2.4 GB

EDIT:

Indeed, iso file size is 2.0 GB with -comp xz!

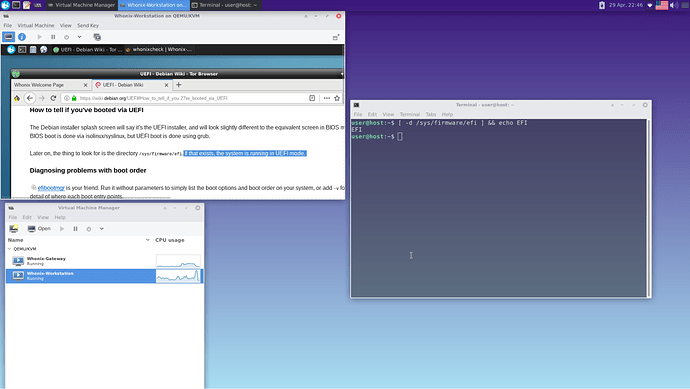
Works fine, wifi and graphic support out of the box. BIOS and UEFI boot as expected, Whonix VMs boot and work normally

The way I understand it, live boot makes it so that all modified files are copied into RAM (overlay). This also applies to the VM images, which are copied into the RAM before being able to start.

→ which explains why the original 100 GB .qcow2 files were unbootable (“no space left on the device”).
→ consequence: Whonix Desktop as a live system needs a lot of RAM in order to run the Whonix VMs (min 8GB I would say). There may be room for fine-tuning (by default the tmpfs takes 50% of the available RAM, i.e. 8GB = 4GB RAM left, 4GB for the overlay tmpfs), see overlay-size option in man live-boot:

   overlay-size=SIZE
       The  size  of  the  tmpfs mount (used for the upperdir union root mount) in bytes, and
       rounded up to entire pages. This option accepts a suffix % to limit  the  instance  to
       that percentage of your physical RAM or a suffix k, m or g for Ki, Mi, Gi (binary kilo
       (kibi), binary mega (mebi) and binary giga (gibi)). By default, 50% of  available  RAM
       will be used.

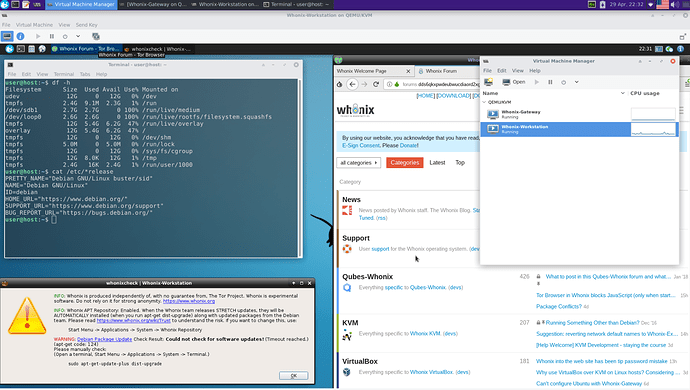
Below a few screenshots taken from the Whonix-Hardened-Debian-Host in live-boot mode, running the Whonix VMs in virt-manager, showing UEFI and WIFI support.

2 Likes

With qemu-img convert -O qcow2 we have the following results:

-rw-r–r-- 1 root root 2.1G May 1 12:06 Whonix-Gateway.qcow2
-rw-r–r-- 1 root root 2.6G May 1 12:08 Whonix-Workstation.qcow2

I did some test in virt-manager, first with 8GB RAM:

Just after the ISO boot, before starting the virtual machines:

user@host:~$ df -h
Filesystem      Size  Used Avail Use% Mounted on
udev            3.9G     0  3.9G   0% /dev
tmpfs           797M   17M  780M   3% /run
/dev/sr0        2.3G  2.3G     0 100% /run/live/medium
/dev/loop0      2.1G  2.1G     0 100% /run/live/rootfs/filesystem.squashfs
tmpfs           3.9G  6.4M  3.9G   1% /run/live/overlay
overlay         3.9G  6.4M  3.9G   1% /
tmpfs           3.9G     0  3.9G   0% /dev/shm
tmpfs           5.0M  4.0K  5.0M   1% /run/lock
tmpfs           3.9G     0  3.9G   0% /sys/fs/cgroup
tmpfs           3.9G   12K  3.9G   1% /tmp
none             10M  4.0K   10M   1% /run/msgcollector
tmpfs           797M  8.0K  797M   1% /run/user/1000

user@host:~$ free -h
              total        used        free      shared  buff/cache   available
Mem:          7.8Gi       375Mi       6.8Gi        32Mi       585Mi       7.2Gi
Swap:            0B          0B          0B

After booting the VMs with virt-manager (default settings, 512 MB RAM to the Gateway, 2GB RAM to the Worsktation):

I failed to boot both VM due a lack of free space on the overlay tmpfs, so just the Gateway running:

user@host:~$ df -h
Filesystem      Size  Used Avail Use% Mounted on
udev            3.9G     0  3.9G   0% /dev
tmpfs           797M   17M  780M   3% /run
/dev/sr0        2.3G  2.3G     0 100% /run/live/medium
/dev/loop0      2.1G  2.1G     0 100% /run/live/rootfs/filesystem.squashfs
tmpfs           3.9G  2.1G  1.9G  54% /run/live/overlay
overlay         3.9G  2.1G  1.9G  54% /
tmpfs           3.9G     0  3.9G   0% /dev/shm
tmpfs           5.0M  4.0K  5.0M   1% /run/lock
tmpfs           3.9G     0  3.9G   0% /sys/fs/cgroup
tmpfs           3.9G   12K  3.9G   1% /tmp
none             10M  4.0K   10M   1% /run/msgcollector
tmpfs           797M   12K  797M   1% /run/user/1000

user@host:~$ free -h
total used free shared buff/cache available
Mem: 7.8Gi 1.1Gi 1.6Gi 2.1Gi 5.1Gi 4.3Gi
Swap: 0B 0B 0B

I did another try with 8GB RAM and with overlay-size=6g appended to the boot command line.

This time, I was able to boot both VMs, but of course I had much less RAM available:

user@host:~$ df -h
Filesystem      Size  Used Avail Use% Mounted on
udev            3.9G     0  3.9G   0% /dev
tmpfs           797M   18M  780M   3% /run
/dev/sr0        2.3G  2.3G     0 100% /run/live/medium
/dev/loop0      2.1G  2.1G     0 100% /run/live/rootfs/filesystem.squashfs
tmpfs           6.0G  4.7G  1.4G  77% /run/live/overlay
overlay         6.0G  4.7G  1.4G  77% /
tmpfs           3.9G     0  3.9G   0% /dev/shm
tmpfs           5.0M  4.0K  5.0M   1% /run/lock
tmpfs           3.9G     0  3.9G   0% /sys/fs/cgroup
tmpfs           3.9G   12K  3.9G   1% /tmp
none             10M  4.0K   10M   1% /run/msgcollector
tmpfs           797M   12K  797M   1% /run/user/1000

user@host:~$ free -h
              total        used        free      shared  buff/cache   available
Mem:          7.8Gi       2.4Gi       229Mi       4.9Gi       5.2Gi       318Mi
Swap:            0B          0B          0B

Eventually, it freezes completely when I open a few tabs in the Whonix-Workstation…

In short, would only work well with a few more GB of RAM, maybe 12 to 16 GB…

2 Likes

Actually I thought it was changes done to the underlying files that were redirected to RAM rather than putting absolutely everything.

I had the impression from reading the Ubuntu wiki that the kernel non-persistent option was what loaded the entire live USB into RAM and therefore allowed a user to disconnect the stick and continue working while the alternative ways of doing live booting didn’t do that and saved only the diffs in memory.

1 Like

You are probably right, but the VM files present themselves as single files to the OS and thus I can’t see how they could be modified without copying them entirely into RAM?

1 Like

Two solutions I see here:

  1. Using Device Mapper snapshotting which operates on the block/sector level as opposed to the file level of stackable (live) filesystems:
  1. Using compression on live data somehow
2 Likes

Since it is a live system you don’t need to modify them.
Overlayfs will copy each file which is opened for writing (like booting the VM images, changing permissions) to RAM.
During building you need to set the VM disk to ro, set the right permissions and then use grub-live in the VMs themselves.
If you do that the system should work with roughly the same amount of RAM as a normal host OS + Whonix VMs.
You can copy the whole filesystem to RAM with the “toram” option and then remove the device you booted from.

3 Likes

To add to the conversation we were having about GNOME vs. XFCE in Whonix host OS:

For those who use VeraCrypt to encrypt their Whonix VMs, I’ve heard that native VeraCrypt unlocking support will eventually show up in GNOME itself, due to the work Tails did to add it in their code to GNOME.

That would add a +1 for me (and others who use VC volumes) for GNOME in host. Its volume unlocking (vs. VeraCrypt’s official binary) is also incredibly faster due to using kernel driver vs. VC app which uses user space driver.

Thanks for the link, I will read it over the weekend!

Very good idea, I’ll try that right away! :+1:

2 Likes

@Algernon

Didn’t work.
What I did:

(on the host hardened machine)

chmod 444 /var/lib/libvirt/images/*.qcow2
chown libvirt-qemu:libvirt-qemu  /var/lib/libvirt/images/*.qcow2

Still copies the file into RAM, before failing with Block node is read-only error:

Error starting domain: internal error: qemu unexpectedly closed the monitor: 2019-05-03T10:07:05.043772Z qemu-system-x86_64: -drive file=/var/lib/libvirt/images/Whonix-Workstation.qcow2,format=qcow2,if=none,id=drive-virtio-disk0: Block node is read-only

Traceback (most recent call last):
  File "/usr/share/virt-manager/virtManager/asyncjob.py", line 75, in cb_wrapper
    callback(asyncjob, *args, **kwargs)
  File "/usr/share/virt-manager/virtManager/asyncjob.py", line 111, in tmpcb
    callback(*args, **kwargs)
  File "/usr/share/virt-manager/virtManager/libvirtobject.py", line 66, in newfn
    ret = fn(self, *args, **kwargs)
  File "/usr/share/virt-manager/virtManager/domain.py", line 1400, in startup
    self._backend.create()
  File "/usr/lib/python3/dist-packages/libvirt.py", line 1080, in create
    if ret == -1: raise libvirtError ('virDomainCreate() failed', dom=self)
libvirt.libvirtError: internal error: qemu unexpectedly closed the monitor: 2019-05-03T10:07:05.043772Z qemu-system-x86_64: -drive file=/var/lib/libvirt/images/Whonix-Workstation.qcow2,format=qcow2,if=none,id=drive-virtio-disk0: Block node is read-only
1 Like

When did you run those commands? While running the iso i.e. live-mode or on the OS in persistent mode?

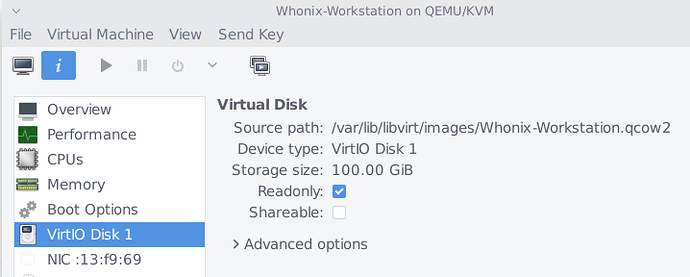
Edit: You also need to set the VM images to ro in virt-manager (can be also done when in live mode)

Also maybe check if the permissions are still correct on the final iso / squashfs filesystem. Just figured out that when running a VM the permissions of the VM images change to libvirt-qemu:libvirt-qemu, but when the VM stops they fall back to root:root .

1 Like

I ran these commands in the raw image before the ISO conversion.

Didn’t know this option was available, do you mean like this?

OK I’ll do everything again and try it out.

1 Like

I rebuilt everything from the beginning and made different tries, some good news to report.

First, @Algernon your solution did the trick! It works now in live mode with ro permissions + ro in virt-manager! The files are not copied anymore in RAM :+1:

Would you know how to enable this option automatically in the .xml files?

So to sum up, now I have a bootable UEFI/BIOS ISO file based on Hardened Debian with Calamares, virt-manager Whonix-Gateway and Whonix-Workstation, all working! :grinning:

I did test the install successfully on an external USB disk and a standard SATA HDD. Both BIOS/UEFI mode, full-disk encryption.

Just a few things that remain to be ironed out/thought of:

  • Debian Live user has passwordless sudo rights by default. Very bad. Root password is still ‘changeme’. An ideal solution would be to give the option to enable admin rights before landing on the desktop (like Tails). In the meantime, I am sure we can remove the passwordless sudo rights in some config file somewhere, just didn’t find out how yet.

  • I ran into a lot of problems with time settings. I don’t know how it is done on the Hardened Debian, but default UTC would never update to the right time, and as a result the Gateway was unable to connect to Tor (stuck at 25%). Even when adjusting by hand on both the host and the VM I was unable to connect to Tor.

  • The ro permissions of the Whonix VM are copied into the target. It would be better if during the install they would be set to normal 755. Don’t know how to do that.

  • The Calamares installer needs to be “Whonixified” (branding), now it looks like stuck Debian 10 installer

  • +Probably many other little things that I don’t remember of…

I will post on GitHub later today the complete scripts I used + a complete list of all the additional packages I have installed on the Debian Host.

2 Likes